How Do I Use One Printer For Multiple Vendors?
By using our 'Order Grouping, you can have orders from different vendors or different child accounts all printed to one central printer.
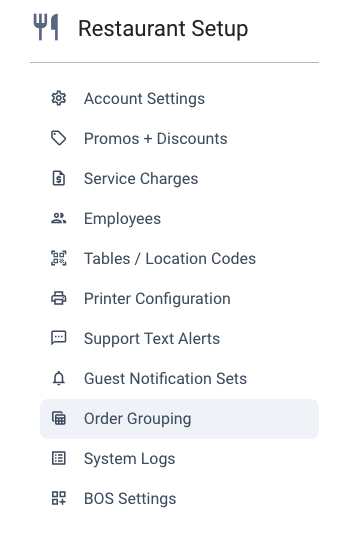
You will need to have both a Printer Control Box and a printer added and connected to an active ethernet port under the Parent account. To verify if you have an active Printer Control Box and printer, navigate to your 'Printer Configuration' settings under the 'Restaurant Setup' section.
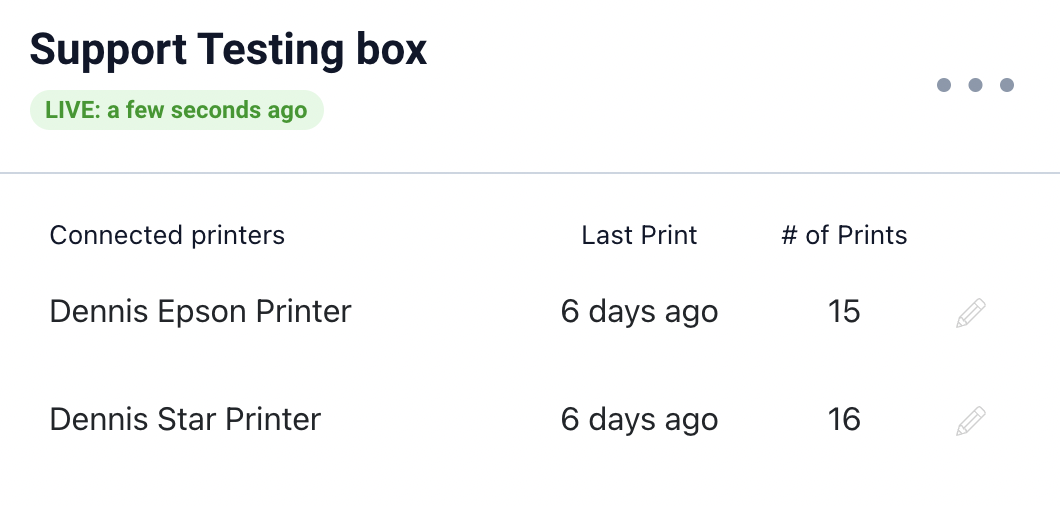
 After clicking on 'Printer Configuration', you should see your Printer Control Box listed. If connected, you should see 'Live' in green below the name of the Printer Control Box. For assistance with connecting a Printer Control Box or printer configuration questions, please contact our support team at support@bbot.menu.
To create an Order Grouping rule, navigate to the Owner Panel and then click on 'Order Grouping' under the 'Restaurant Setup' settings.
From there, click 'Create Order Grouping Rule' which will open a window to allow you to create a new printing rule.

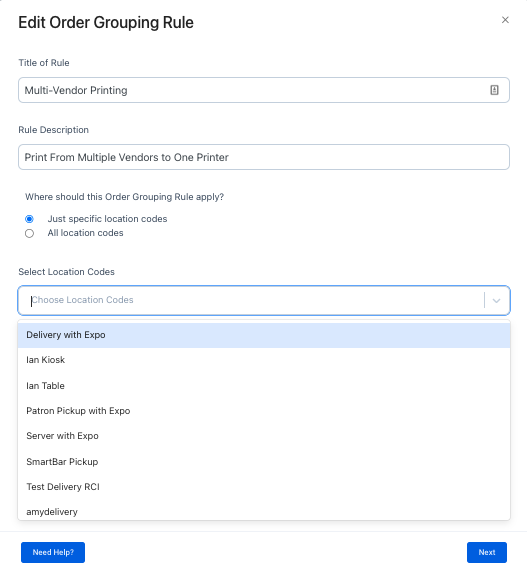
Enter the name and description for the rule, as shown below, and click 'Vendors' to select the child accounts that you would like to have orders sent to your printer.

On this screen, you can also choose to print orders that come from all location codes, or just specific location codes. For specific location codes, you'll be prompted to select from a drop-down menu of all your location codes.
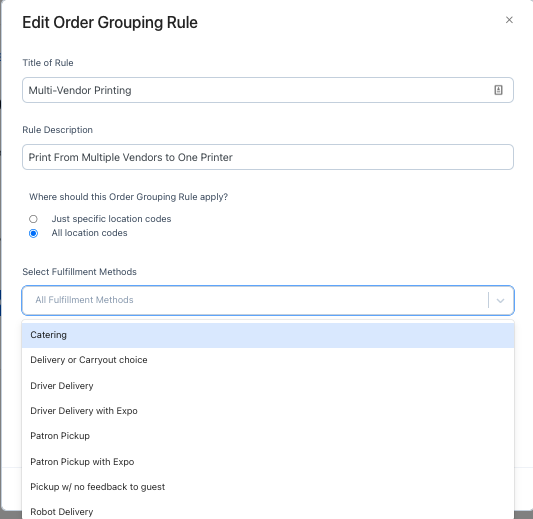
You can also choose to print tickets for all fulfillment methods, or only specific fulfillment methods. If you do not select specific fulfillment methods here, the order grouping rule will automatically apply to all fulfillment methods at the selected vendors and location codes you indicated in the previous steps.
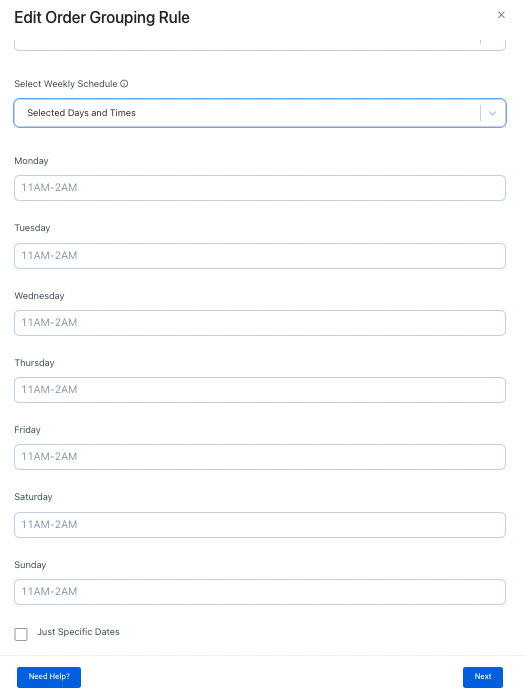
The last option on this page is to set a weekly schedule, where you can choose specific days and times you would like the order grouping rule to be applied. There is also the option to only apply the rule to a specific date(s). If you leave this section blank, the rule will automatically apply all of the time.
When you've made your selections for all of these options, click 'Next.' Here you can select how you would like certain types of orders to be grouped and printed.
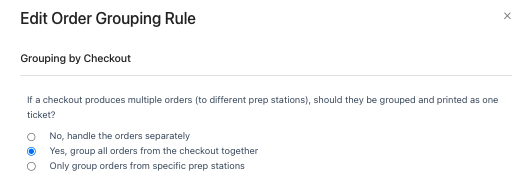
Grouping by Checkout
If you receive multivendor orders or use multiple prep stations, you can choose to have tickets for each vendor or prep station separated and printed as individual tickets, or have all tickets for one order printed as one consolidated ticket (an example would be at an Expo or Pack Out station where the use case is to gather/package together items from multiple stations or vendors).
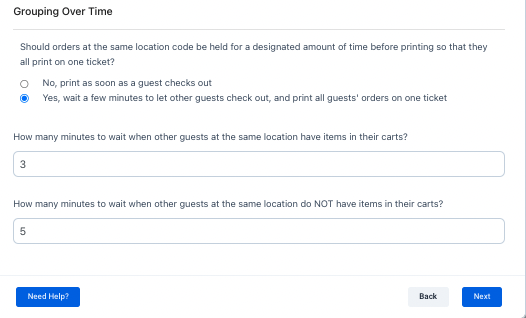
Grouping Over Time
If you select yes for this option, you can choose a designated amount of time to delay printing an order, and the rule will then group any orders placed from the same location within that time as one consolidated ticket. An example would be a large party that is placing individual orders at the same table, but want their orders to come out at the same time.
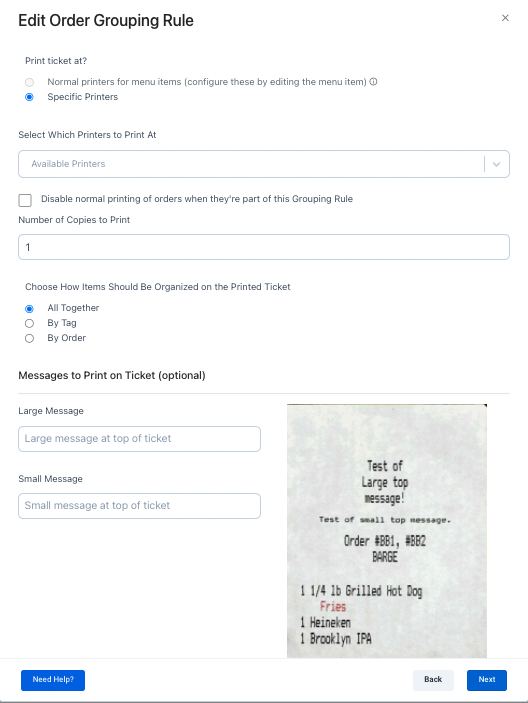
Click the 'next' button to specify which printers should print these orders and configure some of the ticket display settings.
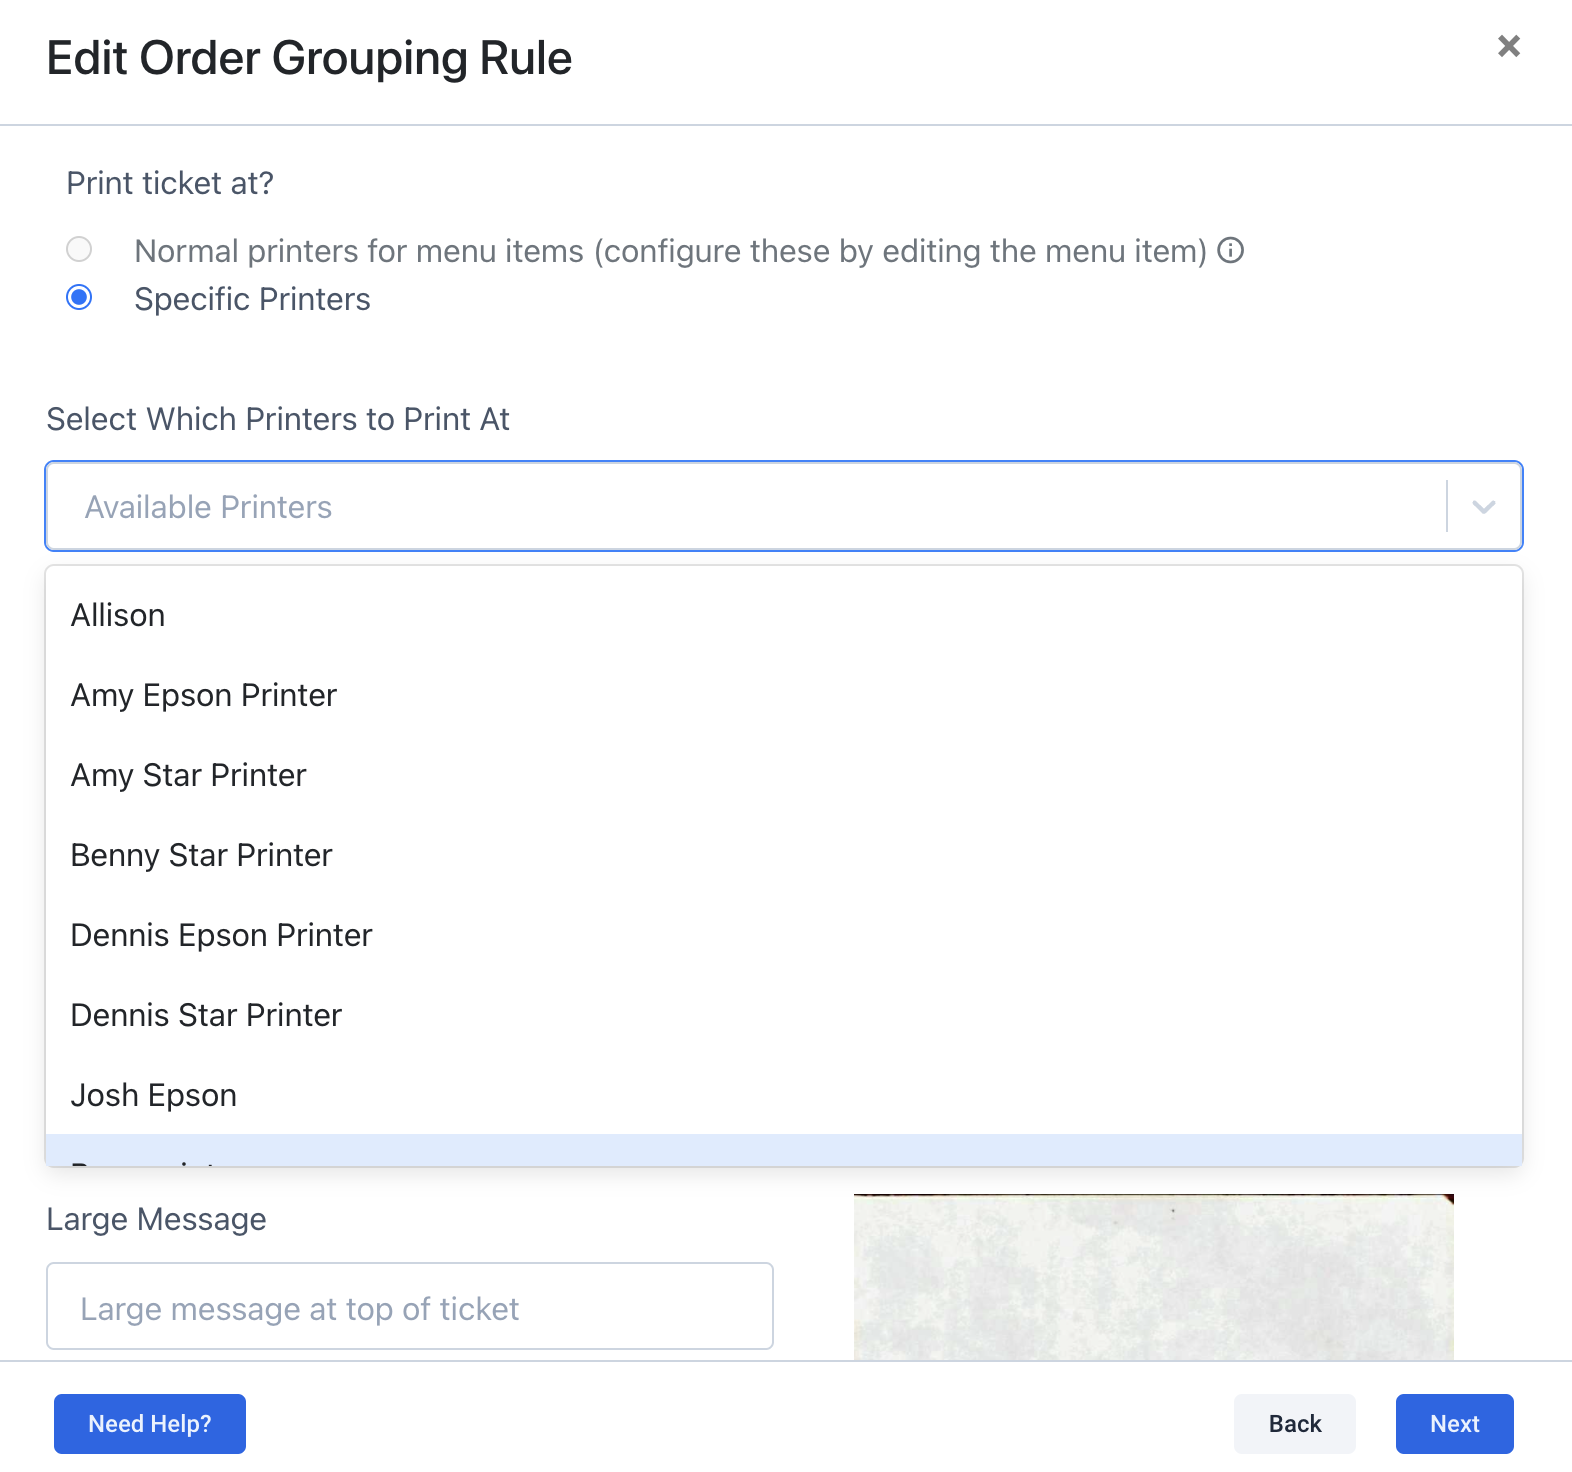
After specifying which printers you'd like to print to, you can select the box beneath that field to disable the normal printing of orders that are part of this rule. You can also specify how many copies of the ticket should print, how items on the ticket should be grouped, and add custom messages to the top of the ticket.
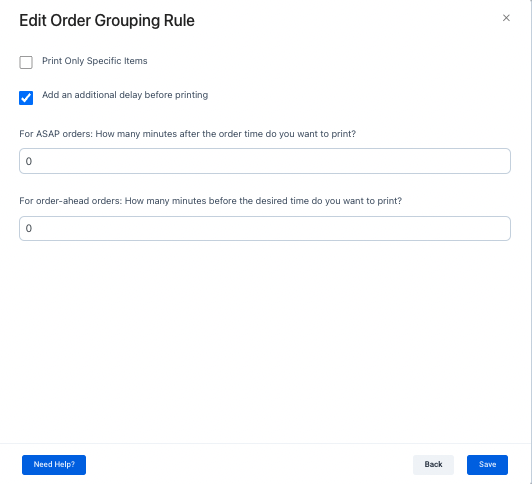
When you are finished configuring these settings, click 'next' to configure the final (optional) settings to apply the rule to only specific items, as well as the option to add a designated time delay for printing ASAP and Future orders.
Print Only Specific Items: By selecting this option, you can choose to apply the ordering grouping rule to only certain items, using menu tags as indicators. Once you've checked the box to apply this setting, you'll be prompted to choose which item tags the rule should apply to from all of your existing menu item tags.
 Add an Additional Delay Before Printing: Selecting this option, you can choose to delay printing orders based on the type of order: ASAP or Future Order.
Now click the 'Save' button to finalize the printing rule.
For additional information about creating 'Order Grouping' rules, please see the article here or contact our Support Team at support@bbot.menu.